Sunday, October 14, 2012

I'm Stripping!

My bossy friend Amanda (anyone noticing a theme here?) told me I have too many dark wood pieces in my house and need to add some color. Between us girls I am a little scared of using bold colors. I usually tend towards safe colors like rust red and browns with some muted greens. I realize that these are not the current "cool kid" colors, but they are what I like. But...I guess there CAN be too much of a good thing and have decided it won't kill me to heed Bossy Amanda's advice.
Dresser pre Ambush Makeover

I chose my victim. An innocent dresser from Bombay Company that really didn't have a problem with it's current shade of mahogany. Poor thing. It didn't know it was about to get a makeover. Like it or not. Sorry, dresser, Bossy Amanda said so. (Amanda is really not all that bossy, I just like to tease her. If you ask her, she'll say I'm the bossy one!)

I consulted my new best friends at Pinterest, for some inspiration. I found a lovely little piece from Design Sponge that was just the color I wanted to try:

So pretty! And BRIGHT. Gulp. 
I liked that it was a bright and happy color, but not crazy. And I thought it would play nicely off of the red curtains in the adjoining living room because red and green are friends on the color wheel. (I am quite impressed with myself as I totally just sounded like I work at HGTV.)

I have painted a number of pieces, but this one was gonna need some stripping and staining to achieve the look I wanted. Since I don't do a lot of stripping,  I called my friend E. She's great at stripping and does it all the time. Tee Hee. She's great at stripping FURNITURE, that is (dirty minds think alike)! Anywho, E has single handedly redone all of her cabinet doors, several furniture pieces and is currently doing all of her dining room chairs, so she had zero extra time to teach me how to do it. But, she made time for me. That's the kind of girl she is. 
My favorite stripper. :)

E directed me to what products to get and even gave me a mini-tutorial on how to get the stain off. I started out with Stripeze, but honestly, it kind of sucks for this project. Bombay Company apparently uses some sort of industrial strength staining process and poor ole Stripeze just didn't stand a chance. After consulting E and Dr. Google I changed to Citristrip and it is the BOMB.COM. I found it at Home Depot for about $20.00. That and a metal scraper thingy. Gotta have one of those. 

Hermitage Green, Sherwin Williams
I found the stain color I wanted at Sherwin Williams. Hermitage Green. It looked JUST LIKE the one I loved from Pinterest. How often does that happen? Never if you are me. I bought a quart of it and a quart of oil based poly. It ran me about $30, but since a new dresser costs way more than that, I didn't think thirty bones was so bad.

Stripping, Stripping, Stripping!
The stripping took FOR-FREAKING-EVER (okay 2 days, but that's a long time when you have the patience of a 3 year old), but the little dresser was finally ready to be the new Jan Brady. Minus the afro, of course.

E suggested using an old sock to apply the stain. She said old socks aren't linty and give a smooth, even application. I have plenty of lone socks because my boys like to leave them outside, throw them under the couch, etc. Never in the hamper. Never. EVER. I bothers me. It bothers Jan Brady, too.

The stain went on pretty easily, but it was not quite the color I had wanted. A little too hunter green and not enough yellow like the example. I thought I might try to add a little yellow or really bright green oil paint into a little of the oil stain and try it on an inconspicuous place on the back of the piece to create a layered effect (there's that HGTV talk again). I mixed the oil paint and oil stains to create a more saturated green, applied it all over the piece, then strategically stripped it off in spots to create an antiqued look. I got impatient and decided to skip the poly coat. Instead, I rubbed the piece with Tung Oil to create a protective layer. I will return the poly and put the funds towards my next victim, er, project.

My crafty mom donated these great glass knobs-Thanks, Mom! 
It's not an exact replica of the inspiration piece, but who wants to be a total copy cat? 
Happy now, Bossy Amanda? I turned into a stripper for you.

Sugar-coated verdict on the project is that I love the result and it didn't cost me more than about $50 and a few days. Truthful verdict is that stripping is hard work and not for the impatient. Props to E for stripping so often and so well.  She must get really tired...

D to the CB-


Sunday, October 7, 2012

Crafy B Pumpkin Hunt

When the boys were preschool aged, our family hosted a family friendly Halloween party called "Pumpkin Hunt." Think Easter Egg Hunt in the fall, with costumes, and cute candy-filled pumpkins instead of eggs. It started as a backyard party, but quickly became a hot ticket for the preschool crowd. Not wanting to leave anyone out, we expanded to a local city park to accommodate more pumpkin hunters. Parents liked it because their kids got to wear their costumes more than once, it was during the day, and was a non-scary event. Kids liked it because they got to wear their costumes more than once and because it was a golden Halloween candy hoarding opportunity. 

We typically held the even the Sunday afternoon before Halloween. Invitations were printed on jack-o-lantern paper, put into orange envelopes, and either hand delivered or mailed about 10-14 days prior. 

D's Tip: Halloween printer paper and orange envelopes can be found at Office Supply
stores or online for much cheaper than buying card invitations. 

Then I got down to bi-ness stuffing about a gazillion little pumpkins with non-melty candies (Halloween in the South can be blistering), spider rings and other little novelties. I tried to make at least 4 pumpkins per child. To make a prize Golden Pumpkin, I spray painted one little pumpkin with gold paint and stuffed it with $5. 
Dollar Tree and party stores have these in packs of 6 or 12. Ebay is also a good source for bulk mini pumpkins. 
My mom and I would get to the park a little early to set up the food and hide the pumpkins. Depending on the ages of the kids we would separate the park into sections for different age groups. That way we didn't have bigger kids stealing pumpkins from the babies (and they would, too!) We let the kids go hunting first, leaving plenty of time for photos, pinatas, food, and free play afterwards.

The park where we held the event was not a playground type park, but instead offered a gazebo, benches, picnic tables, and large shade trees. We set up a photo-op area by placing a bench under a large tree. We used large mums and pumpkins to set the stage for perfect Halloween portraits. I made a reusable sign out of felt to commemorate the event:

Gratuitous pic of my kids when they were still sweet little punkins. 
At the time in my life when these parties were held, I was trying very hard to channel my inner Martha Stewart. I HAND CRAFTED (Martha does not "make," she "crafts") pumpkin and ghost pinatas every year, but in retrospect, the $20 I saved making those things was not worth it. It was a messy project and took up a lot of time. If I had it to do over again, I'd be ordering pinatas from Oriental Trading as fast as you could say "Jack-o-lantern."

For food, I usually prepared a few cutesy make-ahead Halloween dishes to set the mood. Two of my staple theme dishes came from Southern Living:  Monster Eyes and Pumpkin Cheese Ball

Monster eyes are just sausage balls with an olive in the center!

Savory Pumpkin Cheese Ball with apple slices


My third standard Halloweened up recipe was a sweet cheese ball from a local church's cookbook. I made the recipe fit the theme by shaping it into a ghost and renaming it "Ghostly Goo."

Chocolate Chip Cheese Ball (aka Ghostly Goo)
1 (8 ounce) pack cream cheese, softened
1/2 cup butter, softened
1/4 teaspoon vanilla extract
3/4 cup confectioner's sugar
2 tablespoon brown sugar
3/4 cup mini semi sweet chocolate chips
Chocolate and graham cracker sticks

In a large bowl beat cream cheese, butter and vanilla until fluffy. Gradually add sugars and beat until combined. Stir in chocolate chips. Cover and chill for 2 hours. Shape into a ball (or a ghost), cover in plastic wrap and chill at least 1 more hour. Serve with assorted graham cracker sticks. 

This is a favorite with adults and kiddos. 
For the rest of the food, I just supplemented with easy and cheap party foods like chips and salsa, cheesy poofs, cheese cubes, and cocktail wienies. I'll give you a little Crafty B advice. If you give something a cute name, it instantly elevates it. For example, you could serve chips and salsa OR you could serve COFFIN CRUNCH! 
COFFIN CRUNCH (blue corn chips and chunky salsa)
Why serve regular cheese cubes and wienies when you can give your guests SPIDER'S PREY? 

I cut the ring part off some spider rings and hot glued them to toothpicks. Instant Halloween flair!


Turn ordinary pretzel rods dipped in chocolate into MAGIC WANDS by using festive Halloween themed sprinkles (Target always has a good selection).


Here's another "D to the B" tip: Halloween serving pieces are easy to find at most dollar stores, but you could always just go with white serving pieces. They are versatile, inexpensive, and not bound by seasons. Burlap, black tulle, orange and black paper goods and a few miniature pumpkins scattered about the table are all you need create some party spirit. Burlap and pumpkins can be reused for Thanksgiving decor in November. Double duty decorating, baby! 


We finally passed the Pumpkin Hunt torch when the boys turned 6 and 7. They started to find it baby-ish and I was okay with that. A friend with young kids wanted to take it on, so I gladly gave over my menus, decorations, and invitation template. She took my idea and made it her own. I hope she passes it on when her kids grow out of it. That's how traditions are born. 

Stay Crafty, my friends! 

D-

Thursday, October 4, 2012

Confessions of a Cornbread Flunkie

When the hubs and I got married I was not an experienced cook. Most of our meals were from a box and I often completely missed the mark when I tried to leave my comfort zone and cook something sans recipe. To make matter worse, my MIL was and is a fabulous cook, trained up right by hub's late grandmother, Eula (aka Granny). Granny, in my husband's view, is the cook by which all other cooks are measured. Especially when it comes to cornbread. I'm not sure what voodoo magic she used, but her cornbread possessed magical powers and apparently could not be duplicated, especially by a kitchen newbie like me.

I tried and tried over the early years of our marriage to make cornbread "like Granny's" with miserable results. One reason was that NO ONE had her recipe. All I knew was what my husband and MIL could remember about it. "Jiffy mix is a no-no," they said. Granny's cornbread was made from scratch in a cast iron skillet. Hers had a heavenly crust, crispy, buttery and salty with tender innards and golden brown top. Mine had a tendency towards sogginess with a greasy crust, dense middle and overcooked top.  It was not pretty and I would often be frustrated to the point of tears when yet another cornbread batch rose and fell flat. "It's okay," my sweet husband would say, "we don't have to have cornbread."

Friends would try to help, giving me their "I swear it works every time" cornbread recipes and I would find a way to screw them up. Royally. They would sadly shake their heads and look at Dan with pity in their eyes. They wouldn't say it, but I knew what they were thinking, "Poor man...living in a home with bad cornbread."

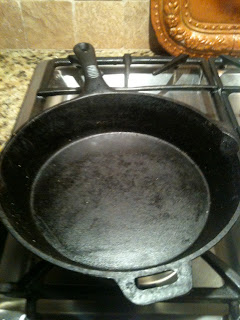
I could have shaken it off, but instead, I maturely crossed my arms, stuck out my lip and refused to make cornbread all together for a while. One day, though, I found what looked to be a promising recipe in my colleague David Holloway's Generous Portions column in the Press-Register. Simply titled Cornbread, this recipe held the promise of grandmother-like goodness. I had to give it a go. I got out my trusty, well-seasoned cast iron skillet:


Carefully followed the recipe and ended up with DECENT GRANNY-ESQUE CORNBREAD. My husband was happy, I was redeemed, and I could once again walk into a room without hearing whispers of, "Bless her heart, she can't make cornbread." It was a red letter day for the D-ster. 

(If you are reading this and are not of the Southern persuasion, I will give you a little education. "Bless his/her heart" is the Down South way of claiming fake pity for someone right before you gossip about them.  For example, "Bless her heart, she has terrible hemorrhoids and Bigfoot body odor. I just can't imagine. Poor thing." It's called manners, people.)

I have since had no trouble with cornbread. The curse has been lifted. I now will even adventurously add a cup of cheese or some scallions into the basic recipe when I'm feeling froggy. I recently made a batch of this deceptively simple staple when I prepared Tortilla Soup for dinner. 

Tortilla Soup with cornbread is one of my favorite fall meals, especially on busy work and after school activity days. It's cheap, easy, and everyone loves it. Plus, it makes a boatload, so there's always enough left for the next day's lunch or to freeze for a lazy day. 

Here's the recipe I use, although there are tons of variations out there: 

Tortilla Soup

1 pound lean ground beef, browned and drained
1 onion, diced
1 can corn, drained
1 can pinto beans, drained
1 can petite diced tomatoes with juice
1 can black beans, drained
1 can chili beans with sauce
1 can kidney beans, drained
1 packet ranch dressing mix (Hidden Valley)
1 packet taco seasoning 
Tortilla chips
Sour cream
Shredded cheese
Diced green onions
Sliced pickled jalapenos

Dump everything into a large crockpot. Add two cans full of water. Stir and cover. Cook on low 8-10 hours. Serve with a buffet of toppings and a giant slab of cornbread. Dig in. Serves many. 

Note the crispy crust on this cornbread. I did that. Yes, I did. 
This recipe is also great for Halloween night. It cooks all day and is warm and ready for before, during, or after trick-or-treating. Give it a gross name like Goblin Guts and the kids will shovel it down. It's all about the marketing, baby. 

More craftiness to come...

D-


Sunday, September 30, 2012

Crafty B Halloween Ghosts

I was reading through the latest Better Homes and Gardens (You down with BHG? Yeah, you know me!) and found some super cute ideas for Halloween decor that don't involve a lot of time or money.

I always decorate my front entry for Halloween. I like old school Halloween decor and often go for the big spider webs, ghosts, and jack-o-lanterns. Flesh eating zombies, not so much. My boys would like that, but they are boys, so I'm not asking them. Decorating is Mom's domain. Step off, tiny men.

BHG had some ideas this month that were right up my alley. Creative stuff like throwing fake cobwebs over dead summer plants (got those!), using electrical tape to turn front windows and doors into spider webs, and making hanging ghosts that will swing in the fall breeze.

Better Homes and Gardens, October 2012


I fell in love with the ghosts. They were simple and super whimsical, but there were a few design flaws in my opinion. They asked for cheap plastic bowls to form the ghost's head. Easy enough. But then, they asked readers to DRILL a hole in the top for the hanging string. I don't drill. I have a husband for that. They also recommended bed sheets or cheesecloth for the ghostly body. Great, except that I live in the coastal South. It rains a lot. It's hot a lot. Rain + Hot = Mold. Yuck. BHG also wanted me to find something called "adhesive backed felt" for the ghost's eyes and mouth. Yeah...did I mention I have boys. I don't even know where to start looking for that.


Cute BHG ghosts. But are they practical enough for me?  


So, I made some modifications. First, instead of a bowl I had to drill a hole in, I found a white plastic colander at Walmart for about $1.97. It had all kinds of holes to thread my hanging string through.


Instead of a white sheet, I purchased 2 white shower curtain liners. They ran me about $2.98 each, but since they are waterproof, I don't have to worry about mold. I kept the liner folded longwise, then I cut the top tabs off and then cut the liners into halves along the horizontal axis (ack! left brain). I left the pieces folded.


As far as the "adhesive backed blah blah whatever," I used black Gorilla tape instead. I tore off square eyes and rectangular mouths for my ghosts. Using the folded edge of each liner half as "top," I put the eyes and mouth on both sides like so, about 8 inches below the fold of each half.

Boo! 

The fold is at the top, above the ghosty's eyes. 

I then cut a small snip into the center of the fold at the top of each shower liner. I threaded fishing line through the colander, then through the hole in the ghost creating a hanging string. I screwed these little hooks into the porch as anchors for the ghosts.  


The ghosts went up at staggered lengths, and yay! Halloween the D the Crafty B way! I already had the big spider and web (a Wally World purchase from a few years ago-probably $10 total), the metal ghost ($14 from Old Time Pottery), and some light up pumpkins from Big Lots ($8 on clearance last year). The dead plants were already there, they just need some fake cobwebs to complete the look ($2 on my next trip Target or Walmart). 

View from the street. 

Ghosts in the breeze. Wooooooo.....
More ghoulish ghosts

Dead plants complete the look...

HAPPY HALLOWEEN! 

More hauntingly D-lightful posts to come. I L-O-V-E Halloween and have a cauldron full of fun, practical ideas for a Halloween party of any size. 

And, yeah, I know I have crappy pictures. My camera died and I am left using my cell phone camera until I get a new point and shoot. Thankyouverymuch. 

-DTCB


I'm New and I'm Learning


Hi! I'm D. Also known as Super D, DMX, Dr. D, Dawn, and "Dear" when my husband is using his "patient voice" with me.

This is me. Nathan is my friend and he knows sign language. His sign for me is the letter D.  His mom, Andi, took this picture of us. She has a photo blog at www.violetfilmphoto.com
I've always been told I'm crafty. Not like Craft Wars crafty, but able to use what I have around me creatively crafty. I call it cheap, but crafty sounds better, I guess. I like to imagine other ladies sitting around saying, "Look at what that D did now! She is one crafty b$%^$." Hence the title of the blog. A girl can dream, can't she?

What can I tell you about me? I like to cook, turn yard sale crap to gold, and write a little, too, all while juggling a husband, 2 boys, 1 cat, 1 dog, more friends than I deserve, and a veterinary career.

My men.

Morphy, the Psycho Springer
Waylon the Fat Cat


Why, then, do I need to start a blog? Don't I have enough to do? Well, the truth is, I'm doing it because my friend, Andi ( www.bringingthesunshine.com), told me I had to. She's kind of bossy, so I obeyed. All kidding aside, I've had my hand in journalism for a number of years. It started with a recipe column in our regional paper (http://topics.al.com/tag/Spice%20of%20Life/index.html) but I have also written features and personal interest stories. The paper recently became more digitalized and now has less days of actual printed papers. My column got cut, but I did not. While I will still write for them periodically, I knew I would miss the weekly outlet of having my own column.

I'm sure you are thinking, "A veterinarian trying to do crafty home stuff. Sounds like a winner."
While I admit I do suffer from some left brain vs. right brain issues, Andi assures me that I have something to offer the blogosphere. What, I am not sure of. She couldn't put her finger on what that "something" was, exactly. She said, "Do something about thrifty decorating, cooking, and stuff about your life." To quote Bon Qui Qui, "Dang! Anything else?"

1000 Ruudes

So, here we are. Me and the currently ZERO followers I have. We are gonna be great friends, I can tell.

Craftiness to come...

-DTCB